DIY Pet Hammock
This shop has been compensated by Collective Bias, Inc. and its advertiser. All opinions are mine alone. #NutrishCatCrafts #CollectiveBias
Several days, as I walk out the door for work, I look back and see Dirty Bit sprawled across the living room floor without a care in the world. What a tough life! She's constantly fed, watered, cleaned up after, and catnaps truly rule her life. For those of you who are new to my blog, Dirty Bit is our cat. She makes us laugh, drives me crazy, but truly is a part of the family.
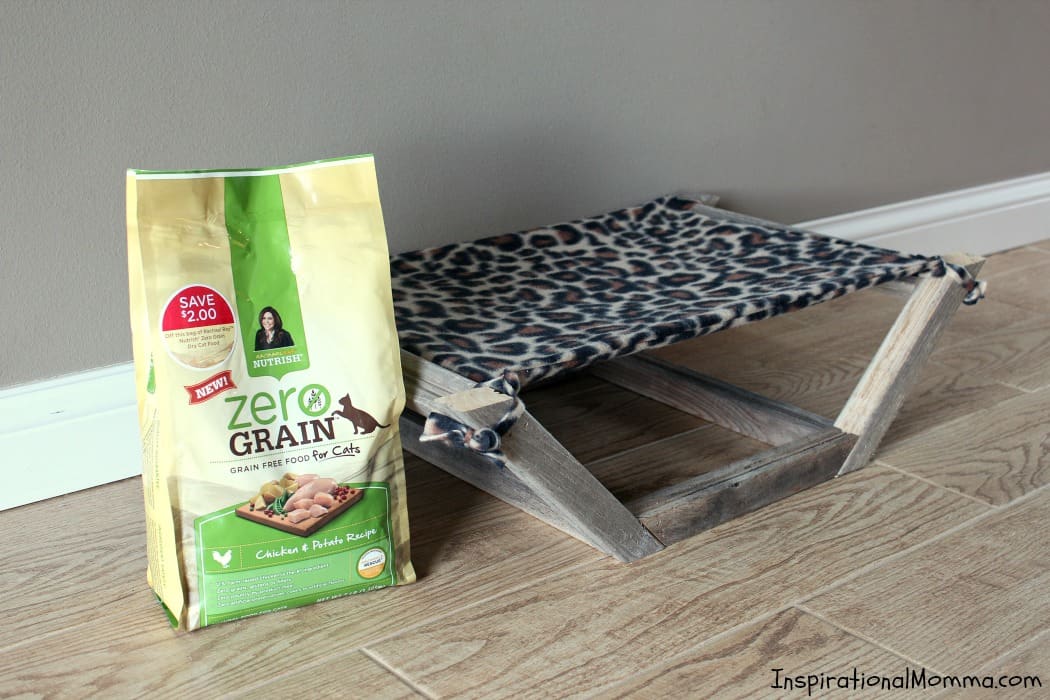
Because I love the furry little thing so much, I'm always searching for ways to make her life a bit more enjoyable. It is hard to believe a cat's life can possibly get any better, but I try anyway. My first focus was to research and select a cat food with delicious and wholesome ingredients. After all, I do my best to serve my family yummy food, why should our animals be any different? While perusing the internet, I came across Rachael Ray™ Nutrish® Zero Grain Food for Cats.
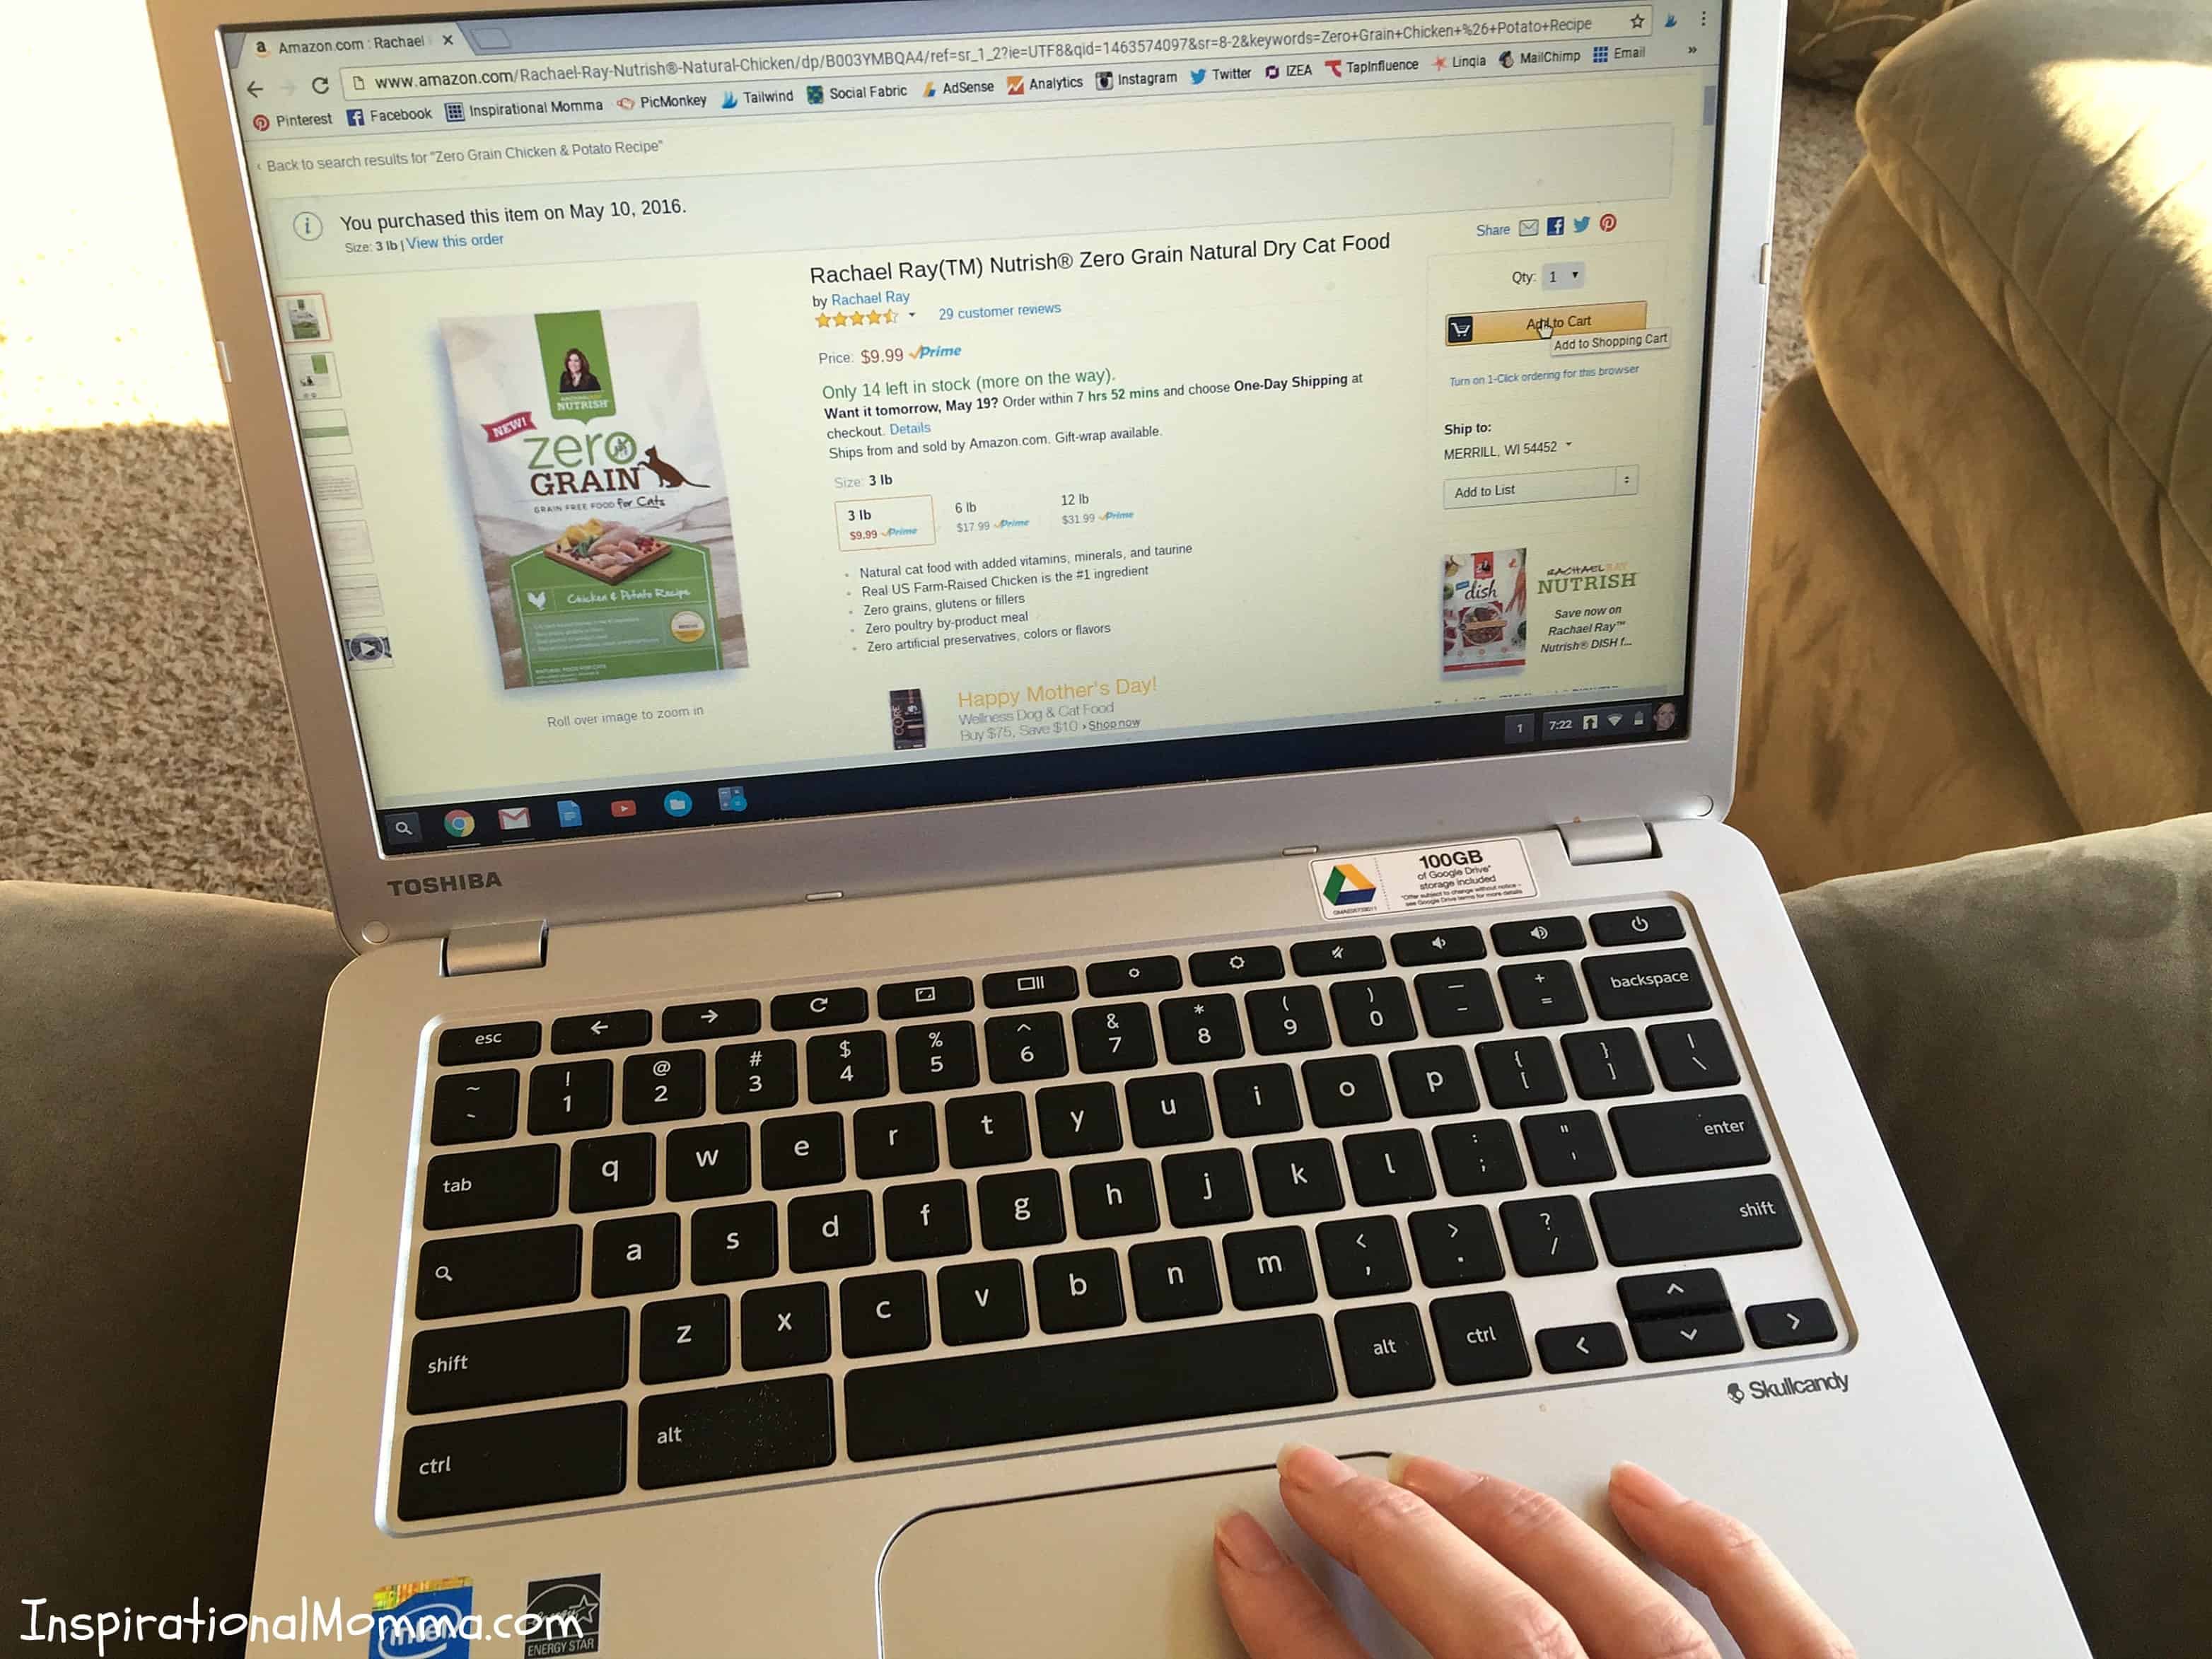
After doing some research, I was blown away by the information that I found. I decided to make the switch. It is natural and has vitamins, minerals and other essential nutrients. While they do have a wide variety of both wet and dry flavors, I chose the Zero Grain Chicken & Potato Recipe. One of the best parts, I found it at a great price on Amazon.com while sitting on my couch! In two days, it was shipped straight to my front door!
To be sure not to upset Dirty Bit's stomach, we gradually introduced the food by incorporating it into her current food over the course of 7-10 days. Slowly, we replaced her old food with Rachael Ray™ Nutrish® until it was completely switched over.
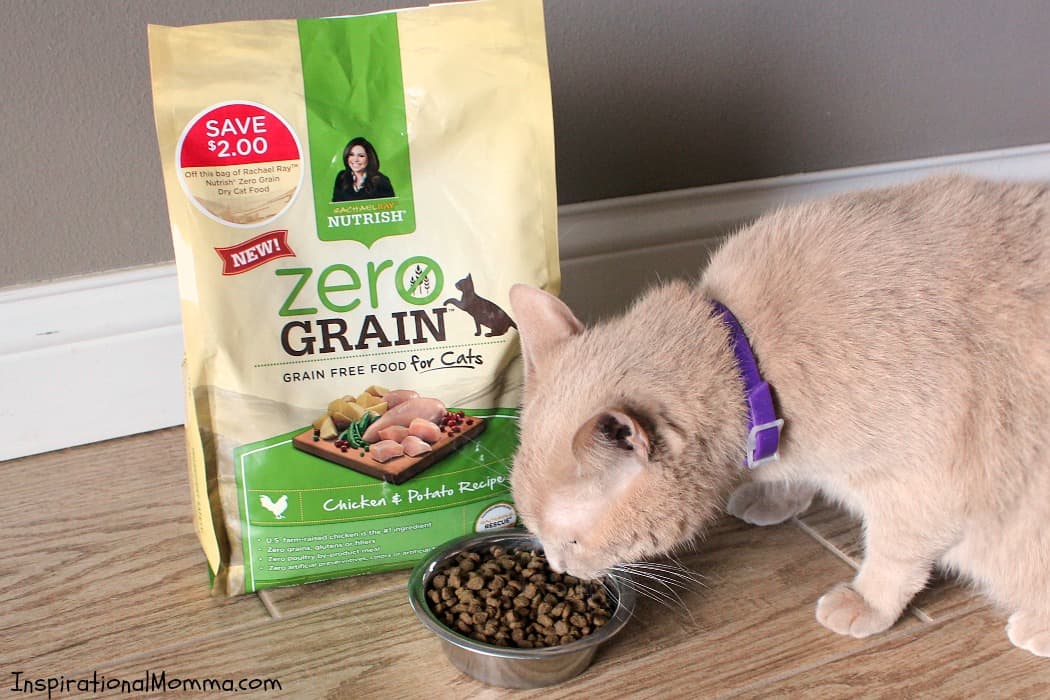
I was amazed at how smoothly she transitioned over. It is also a great feeling knowing that she is now eating such a high-quality food. If you are looking for a nutritious and delicious choice for your feline, I highly recommend Rachael Ray™ Nutrish®. Rachel Ray is dedicated to provide super-premium foods for cats and dogs, as well as donate money to shelter pets in need. Rachel's Rescue has donated over $14MM to date.
Once we had her food situation improved and taken care of, it was time to focus on comfort. We recently made a her a DIY Pallet Cat Bed, which we can not get her to lay in. However, it has turned into a stashing place for the all little things she steals from us. Like I said...she is a crazy cat.
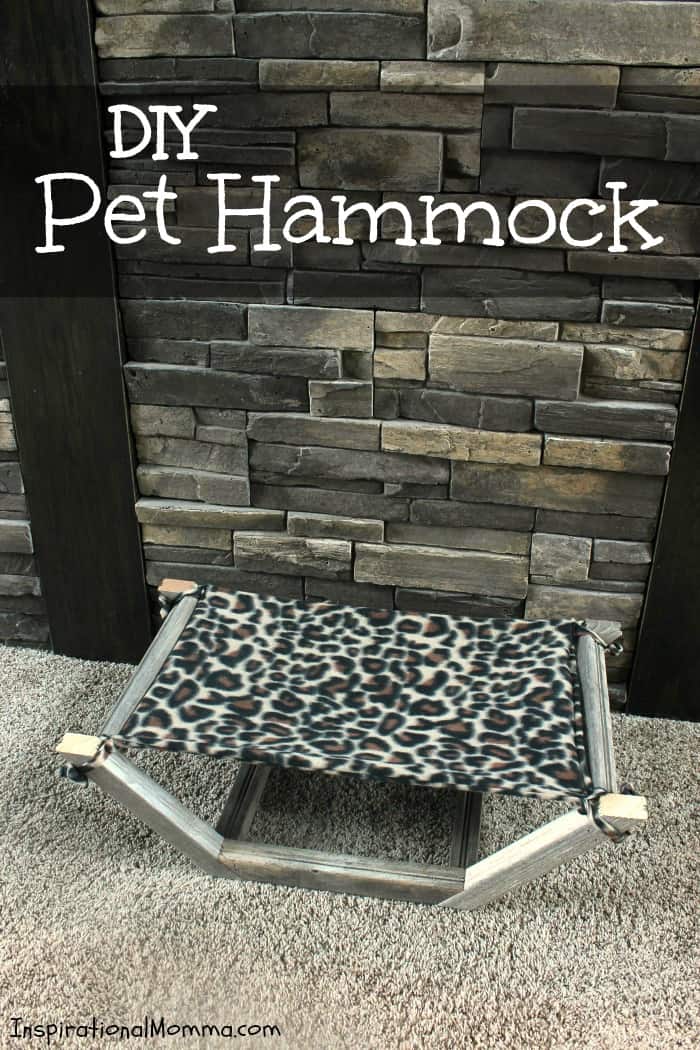
In an attempt to create a relaxing place that Dirty Bit would actually use for the right reason, my husband and I designed and made this DIY Pet Hammock. It literally took us about 30 minutes to make from start to finish, and she has already taken a liking to it. She was a little hesitant at first, but she has left evidence (she is currently shedding) that she has been using it.
The thing that I like most about this DIY Pet Hammock is that I made it out of just 5 old deck spindles (see image below). My sister-in-law recently redid her deck railings. Thankfully, I showed up just before the spindles went up into flames. These particular spindles are 1.5" x 1.5" and 32" long. To create your own DIY Pet Hammock, you need the following materials.
Frame:
4-10" boards (2 45-degree angles in the same direction)
2-12" boards (2 45-degree angles in opposite directions)
4-13" boards (straight cuts)
2" nails
Fleece:
1-15" x 24" piece
4-1" x 16" strips

Step 1: Form sides of frame by securing 2-10" boards and 1-12" board together.
Step 2: Connect both sides of the frame together with the 4-13" boards. Be sure it is sturdy and well-secured.
Believe it or not, the frame is complete. Now it is time to create the hammock.
Step 3: Sew one strip of fleece to each corner of the large piece.
Step 4: Tie the hammock to the frame.
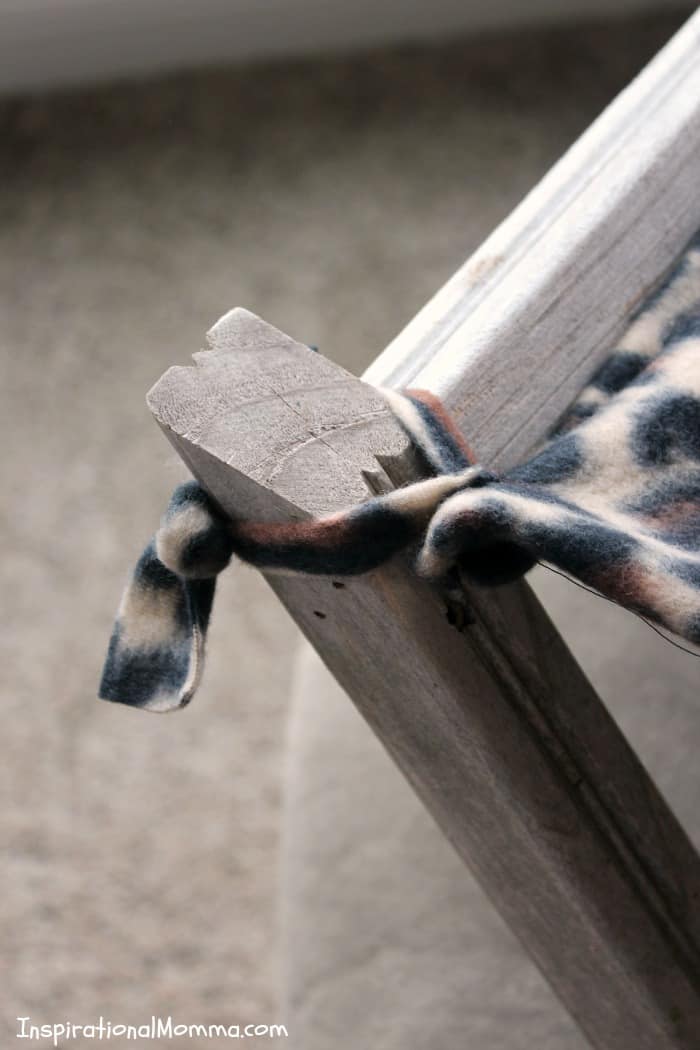
I know it seems crazy, but your DIY Pet Hammock is done and ready for your fur-baby! The material is easy to take off and wash, but it is still extra comfy for your sweet kitty-cat. If you are feeling adventurous, you can also switch the pattern up often, giving your DIY Pet Hammock a fresh look!
If you are looking to discover more fun tutorials and cat related content, check out the Rachael Ray™ Nutrish® Pinterest page.
Get Inspired!
Never miss my delicious recipes, cute creations, or household tips!