Pinwheel Highlighting

I am going to admit right away that this post was never on my potential list of things to blog about. However, I am often called on by family members and friends to play "hairdresser" for them. I have cut hair (men, women, and children alike), as well as foiled, dyed, and highlighted. I just approach the situation thinking, "I guess I'll give it try. Afterall, if they don't like it, it will either grow back or we can color over it." For the most part, I have a pretty successful track record, which has caused my "clients" to keep coming back.
Just this past weekend, my cousin asked me if I was willing to dye her hair. As always, I gladly excepted! She wanted to transform her VERY blonde (almost white) highlighted hair into a warm honey blonde with lots of texture. After browsing Google, we decided to try the latest trend...Pinwheel Highlighting. I must admit that I was a bit skeptical, but after breaking the process down, it seemed fool-proof.
After some deliberation, she chose Clairol's Light Brown for her base color and Clairol's Medium Blonde for her highlights. As I said, her goal was to warm her color up a bit and create a more natural look versus a bleached out look.
STEP 1: Separate out a base layer. I parted her hair straight across from ear to ear. I do apologize because I don't have a photo of this step. From here on out, I will refer to this section of hair as the base layer.
STEP 2: Separate the top layer of hair into wedges to form a pinwheel. Because she wanted more subtle variances in color, we chose to use ten wedges. For a more chunky look, you could cut this number down.
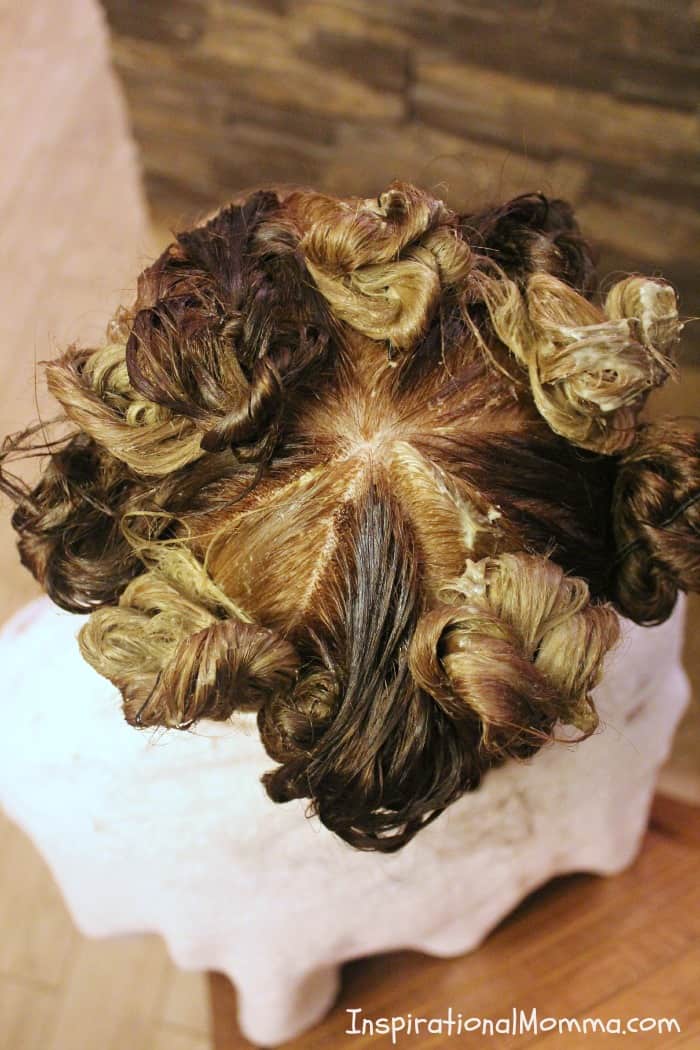
STEP 3: Apply color to base layer separated out earlier. Because she preferred a darker base, we used the light brown color.
STEP 4: Apply coloring to hair one wedge at a time. We chose to do the darker color first because that was the color she wanted to show through a bit more. This can vary based on preference.
STEP 5: Allow color to develop on hair for recommended length of time. Rinse when complete.
Having colored and highlighted hair in the past in numerous ways, I was a bit hesitant when we initially found this technique. However, what I discovered throughout is that it is so simple and the end results look very natural. I would strongly recommend Pinwheel Highlighting. It has been many years since I have experimented a bit with my haircolor, but this just may tempt me enough to give it a try myself!
Get Inspired!
Never miss my delicious recipes, cute creations, or household tips!