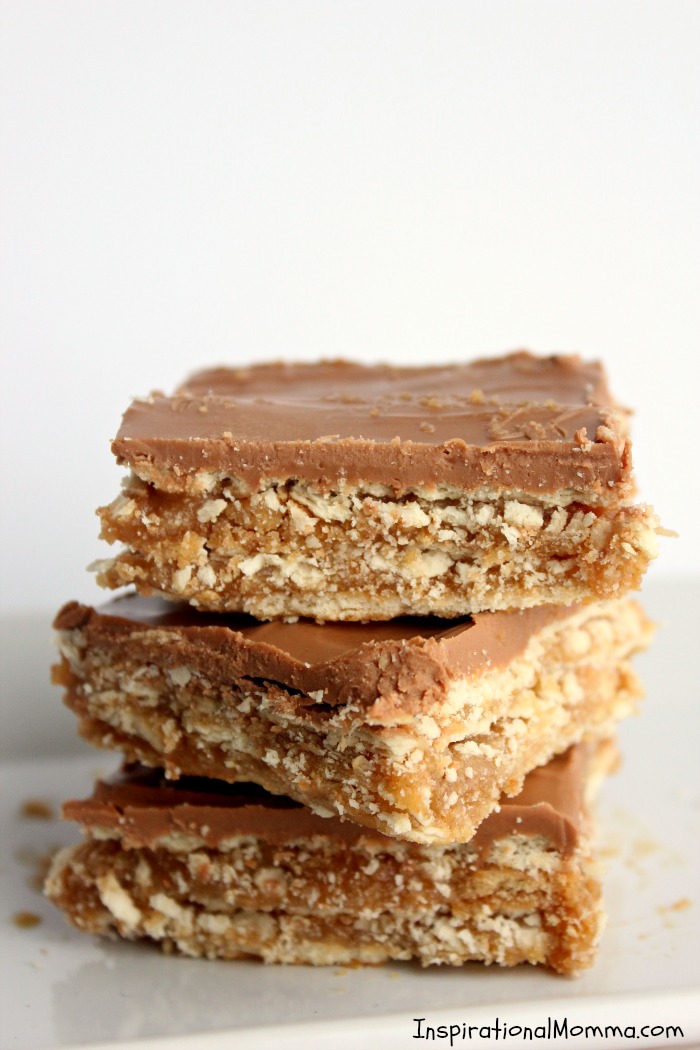
Homemade Kit Kat Bars

"Do not EVER make these again!"
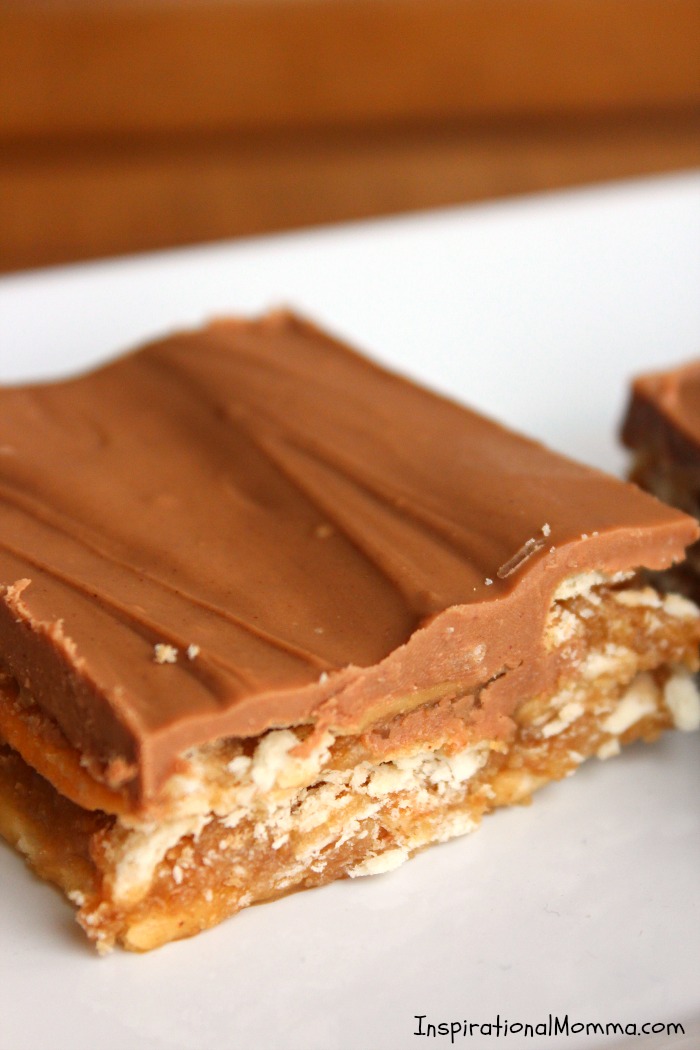
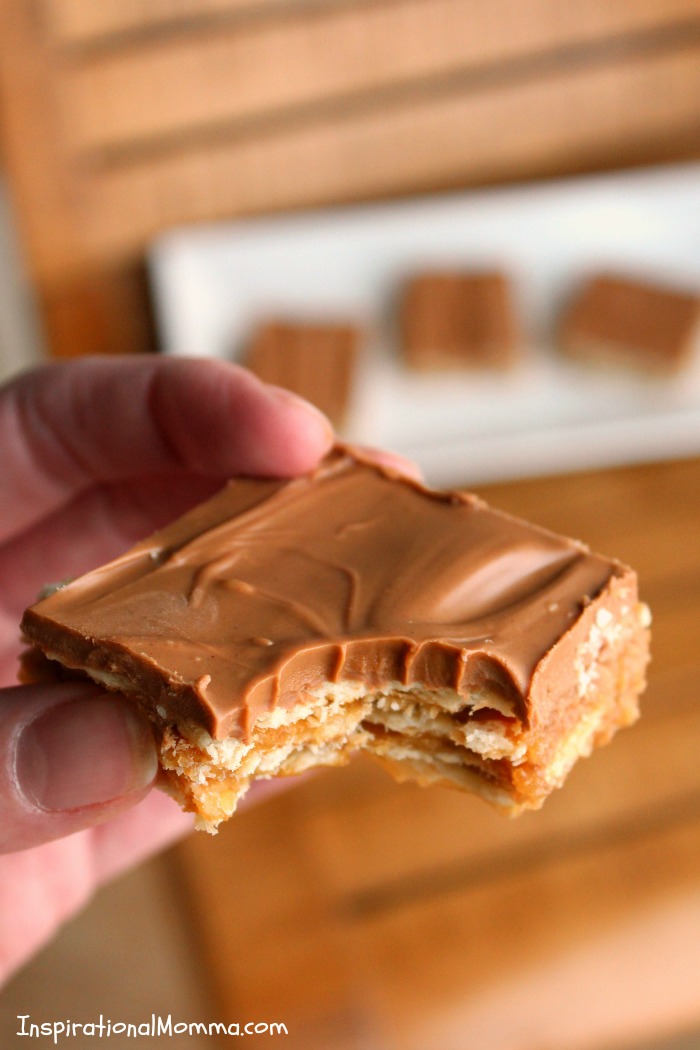
Those were the words that came out of my husband Andrew's mouth the first time I made these Homemade Kit Kat Bars. First off, I was a bit confused. From what I witnessed, it appeared as though he liked them. I had also noticed a few more bars missing each time I checked the pan. Even though my husband never wanted me to make these bars again, I knew my kiddos must be enjoying them. Before I knew it, the pan was empty. I was also 100% sure that I loved them, and they easily made their way onto my "Favorite Desserts" list. I would be making them again!
Despite this, my curiosity was driving me crazy, I had to ask Andrew what was so bad about my Homemade Kit Kat Bars. When I did, all he could do was laugh. This made me even crazier. I knew he liked peanut butter, caramel, etc. What could it be? Then...the truth came out. My dearest husband not only liked the bars, he LOVED them. That is the exact reason why he ate almost the entire pan in just two days. Apparently it wasn't the kids sneaking them! That is also the reason why he told me I could never make them again. He liked them so much, he realized he had no self-control when it came to eating them. He just couldn't resist my amazing Homemade Kit Kat Bars.
Check out the recipe below, and begin tempting someone in your life!
Ingredients:
1 1/2 sticks butter
1 cup brown sugar
1/2 cup milk
1/3 cup white sugar
2 cups crushed graham crackers
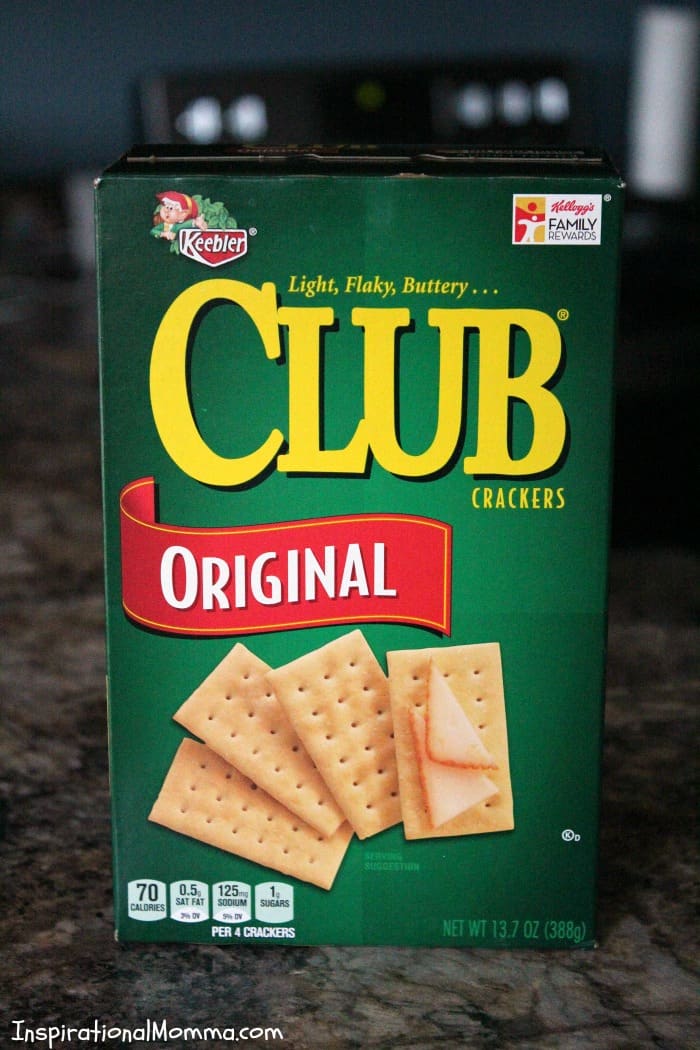
1 box Keebler Club Crackers (see picture below)
1/2 cup butterscotch chips
1/2 cup chocolate chips
2/3 cup creamy peanut butter
Step 1: Boil butter, white sugar, brown sugar, milk, and crushed graham crackers together for 5 minutes, stirring often.
Step 2: Place layer of crackers on bottom of greased 9x13 pan.
Step 3: Spread half of boiled mixture over crackers.
Step 4: Place another layer of crackers in pan.
Step 5: Spread remaining half of boiled mixture over crackers.
Step 6: Place one more layer of crackers in pan.
Step 7: Melt chocolate chips, butterscotch chips, and peanut butter together in a microwave-safe bowl.
Step 8: Spread melted mixture over last layer of crackers.
Step 9: Refrigerate 3 hours, or until top layer has hardened, before cutting.
Keep refrigerated.
- 1 1/2 sticks butter
- 1 cup brown sugar
- 1/2 cup milk
- 1/3 cup white sugar
- 2 cups crushed graham crackers
- 1 box Keebler Club Crackers
- 1/2 cup butterscotch chips
- 1/2 cup chocolate chips
- 2/3 cup creamy peanut butter
- Boil butter, white sugar, brown sugar, milk, and crushed graham crackers together for 5 minutes, stirring often.
- Place layer of crackers on bottom of greased 9x13 pan.
- Spread half of boiled mixture over crackers.
- Place another layer of crackers in pan.
- Spread remaining half of boiled mixture over crackers.
- Place one more layer of crackers in pan.
- Melt chocolate chips, butterscotch chips, and peanut butter together in a microwave-safe bowl.
- Spread melted mixture over last layer of crackers.
- Refrigerate 3 hours, or until top layer has hardened, before cutting.
- Keep refrigerated.
Get Inspired!
Never miss my delicious recipes, cute creations, or household tips!