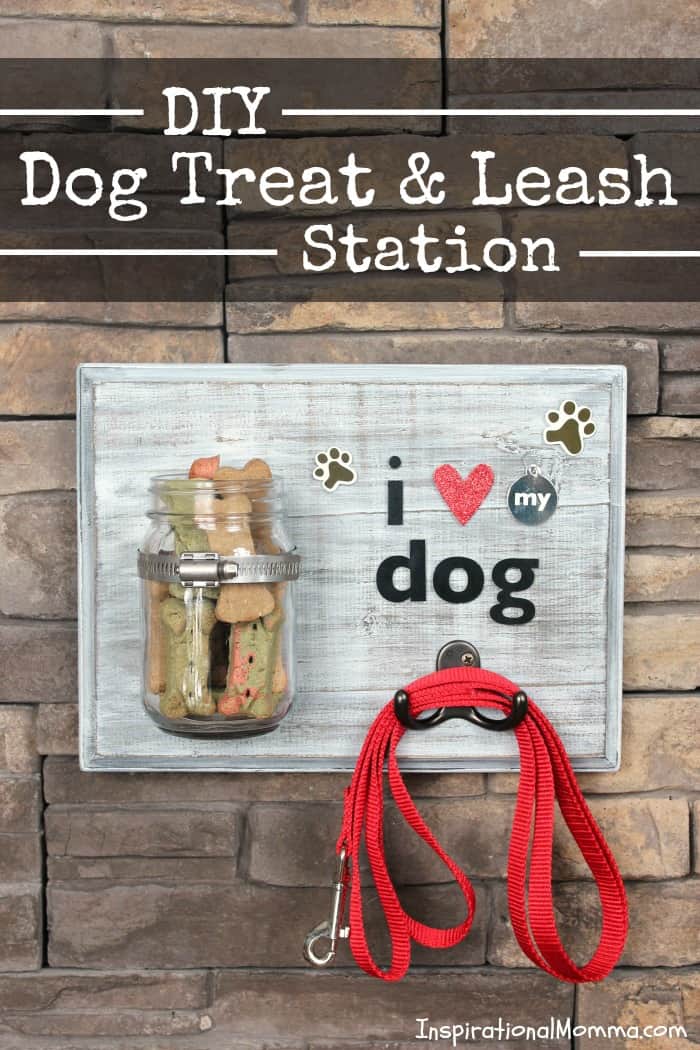
DIY Dog Treat & Leash Station
This shop has been compensated by Collective Bias, Inc. and its advertiser. All opinions are mine alone. #FeedDogsPurina #CollectiveBias
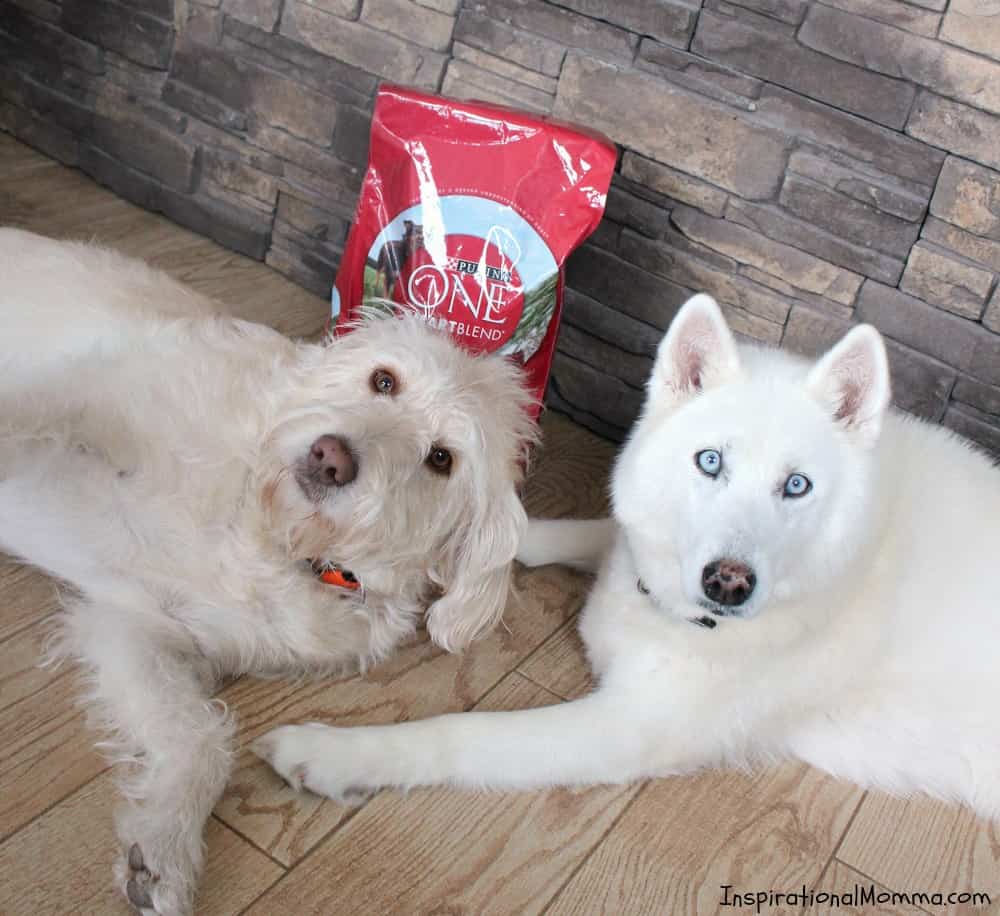
A dog is man's best friend. While this may be true for many, it is not the case in our home. Our puppies are so much more than our best friends. My husband and I see them as our children. Our kiddos see them as siblings. They truly are a part of our family that continue to put a smile on our faces every day! Our first fur-baby, Nala, is a 14-year old Siberian Husky. Even though she is getting up there in age, she still has spunk and keeps us all on our toes. Our other hairball is Luna, a 1-year-old Labradoodle that is full of pure entertainment.
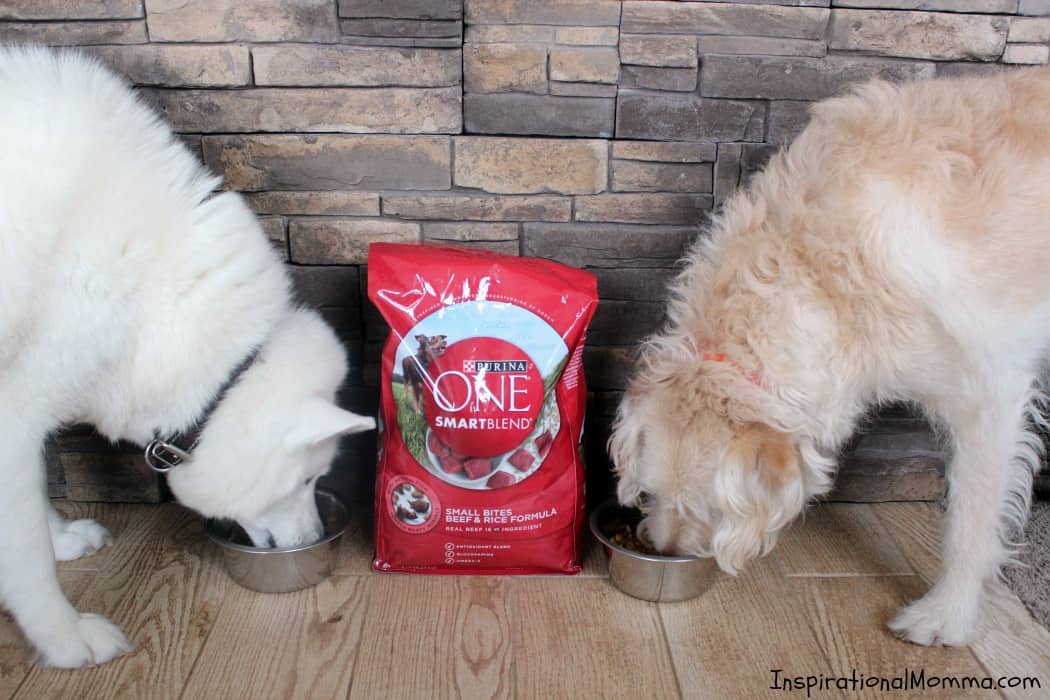
Because Nala and Luna hold a special place on our hearts, it is important to me to make sure they feel some love continuously! While we do this in many ways, I want to be sure to make mealtime as enjoyable as possible for them. To make sure I do just that, I run to Target and pick up some Smartblend® Small Bites Beef and Rice Formula Adult Premium Dog Food! With real beef as the first ingredient, I know my girls are getting the yummy flavors they deserve. In addition to this, the great combination of ingredients promote strong muscles, a radiant coat, and healthy heart, skin, and joints. You just can't go wrong!
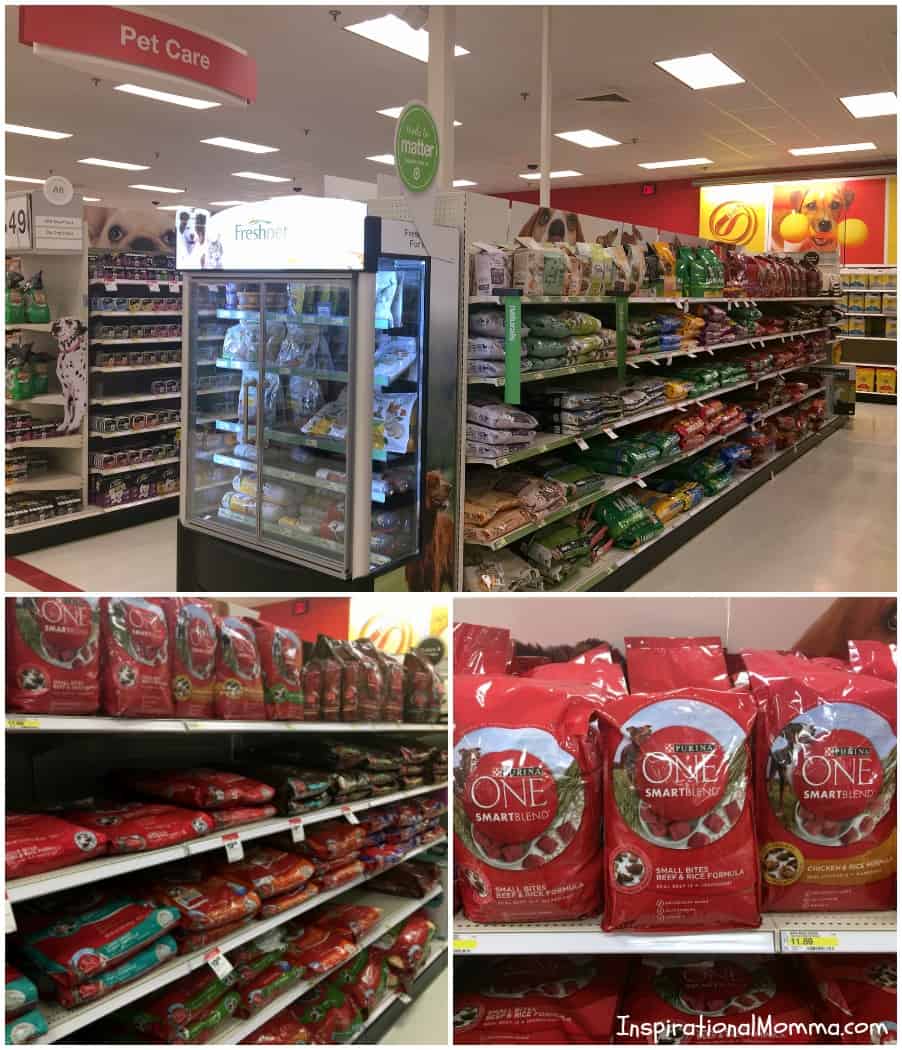
I'm not sure about you, but I find myself at Target a couple times a week. And boy do I have a deal for you! Using Target's Cartwheel app, you can save 20% on great Purina dry dog foods! Make sure you save some room in your cart for delicious, nutritious dog food for your furry family member!

In addition to providing our pooches with delicious Purina One Smartblend Dog Food, I am always looking for ways to spoil them! Today, I am excited to share with you a step-by-step tutorial for creating a DIY Dog Treat & Leash Station. They have quickly discovered that ours means one of two things! They are either going on a walk or getting a treat! Either one makes their tails wag!
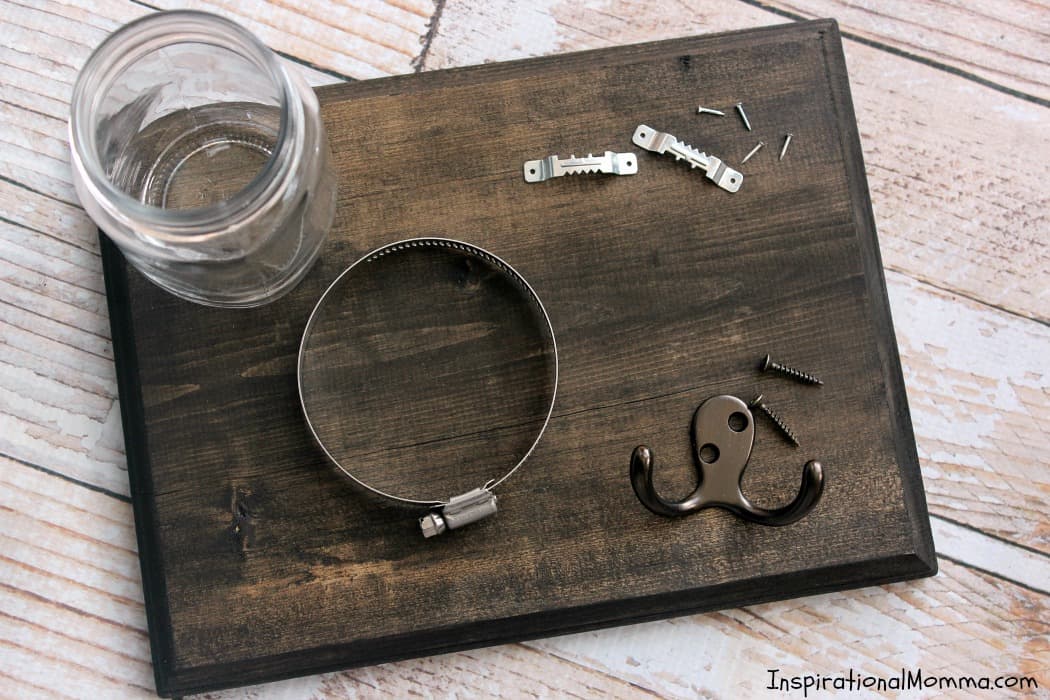
Materials Needed:
- Wood (8.5" x 11")
- Stain (I used Dark Walnut)
- White Paint (Satin)
- Sandpaper (120 grit)
- Mason Jar
- Large Hose Clamp
- Flat-head Wood Screw (1" long)
- 2 Sawtooth Picture Hangers with Nails
- Double Robe Hook with Screws
- Stickers of Your Choice
Now it is time to get started! For this project, I made it my goal to only use items that can be conveniently found no matter where you live. This particular piece of wood that I used was purchased at a local craft store. Its dimensions are 8.5" x 11" and it does have beveled edges. There were several options to choose from, so be sure to pick something that fits the look you are trying to achieve.
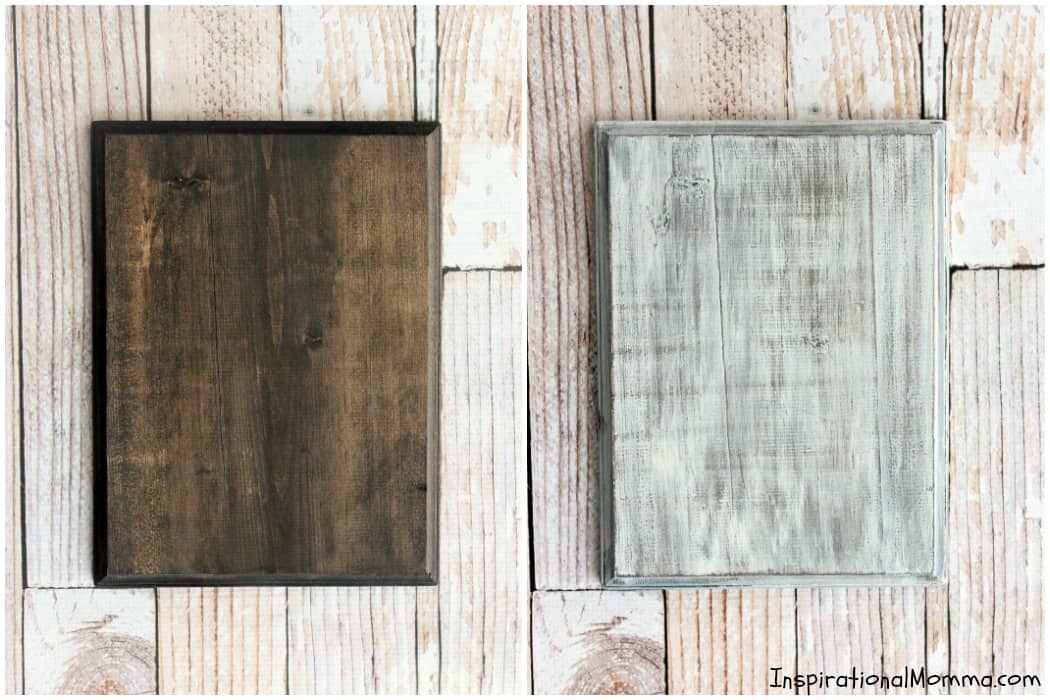
The two photos below show the steps I took to create a weathered look.
Step 1: Stain your wood with a darker colored stain. I used Dark Walnut, but the names may vary depending on the brand.
Step 2: After allowing the recommended amount of drying time, brush a thin layer of white paint over the stain. Using a clean rag (that is able to be thrown away), immediately wipe away the white paint, following the grain of the wood. This will create a rustic, weathered look. Allow to dry for about one hour.
Step 3: Gently sand the wood, following the grain. If you desire a darker finish, press a bit harder and more of the dark stain will show through.
When it came to assembly, I was lucky enough to have my dad help me. When I was quite young, he had me in the garage with him, using the drill and helping out where I could. This time, I had a chance to show him a little bit of what I do. It was so fun spending this time with him! Lots of laughs and tons of memories!
Now, let's continue with our project!
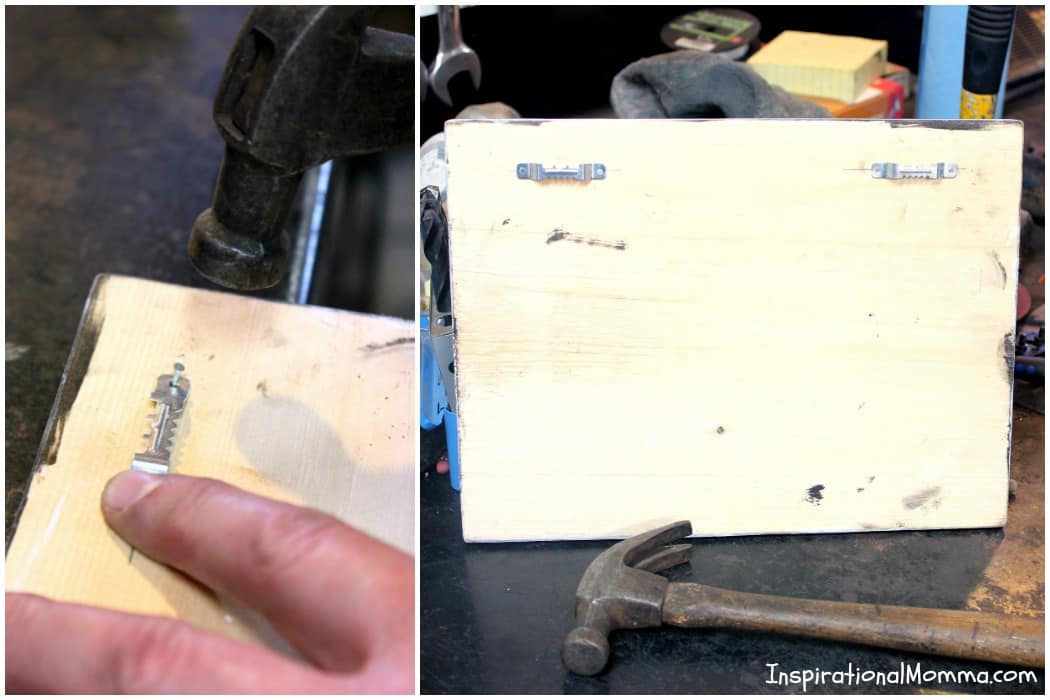
Step 4: Attach the hanging brackets to the back of your wood. Be sure to measure and mark just where you are going to attached them to be sure your DIY Dog Treat & Leash Station hangs straight. I placed mine 1" from the top and 1.5" from each side.
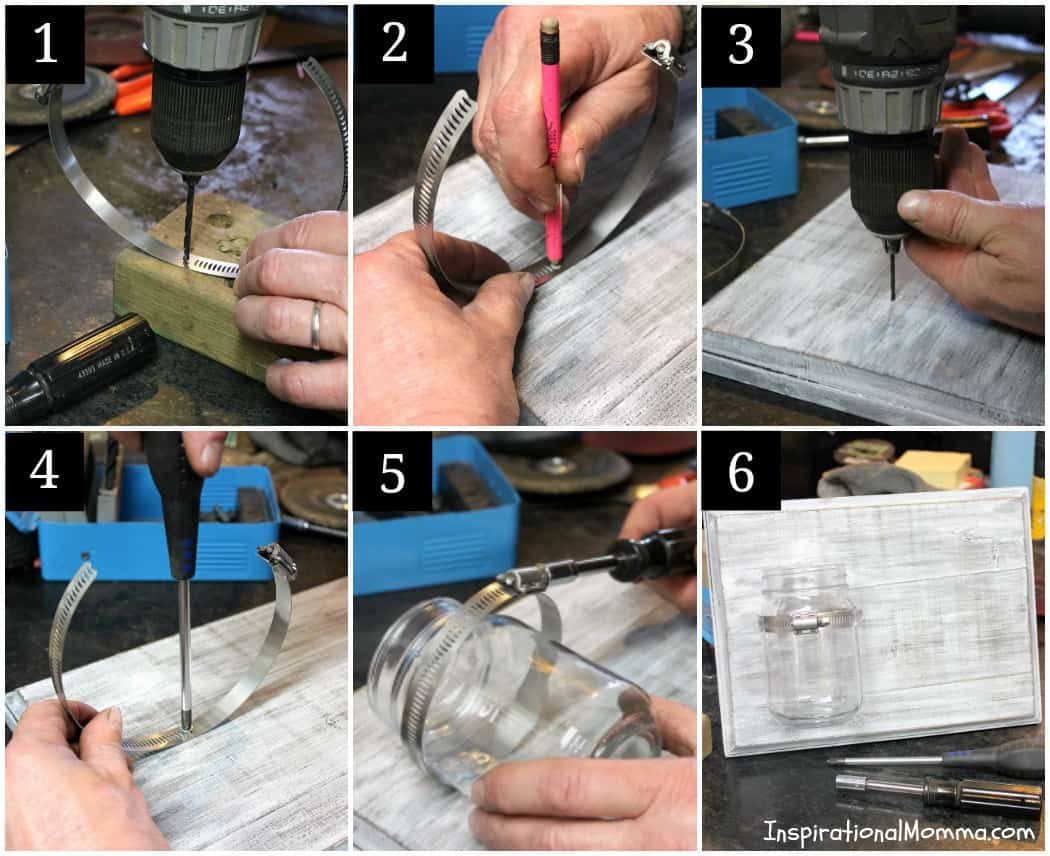
Step 5: Now we must secure the hose clamp. You will first need to open it so you are able to measure and work without it being in your way. Follow the photos below for a visual guide.
Step 6 (Photo 1): Using a drill, create a hole in the hose clamp that is just a bit bigger than your flat-head screw.
Step 7 (Photo 2): Decide where you would like your hose clamp attached to the wood and make a small mark.
Step 8 (Photo 3): Using a drill bit that is smaller than your screw, create a pilot hole. This will help prevent your wood from cracking when you screw the screw in.
Step 9 (Photo 4): Attach your hose clamp to the wood using the flat-head screw in the pilot hole.
Step 10 (Photo 5): By tightening the hose clamp, secure your mason jar to the wood. It is important to screw it tight enough to avoid the jar from falling out, but you also must be careful not to tighten it too much, which could cause your jar to break.
Photo 6 shows your what your DIY Dog Treat & Leash Station should look like up to this point.
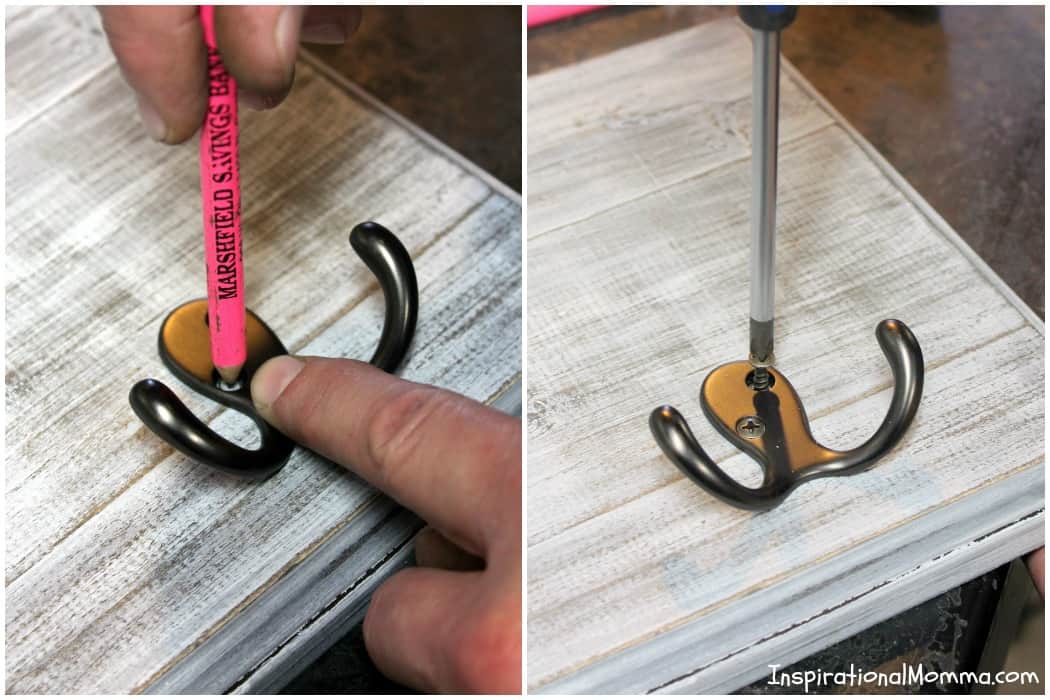
Step 11: Before attaching the double hook, make marks to ensure it is right where you want it.
Step 12: After drilling two pilot holes, attach the double hook using the screws that it came with.
Step 13: Now it's time to personalize your DIY Dog Treat & Leash Station! While at the local craft store, I picked up these fun stickers. I found them in the scrapbooking section. There were so many cute ones to choose from, I am sure you will find something that fits your style perfectly!
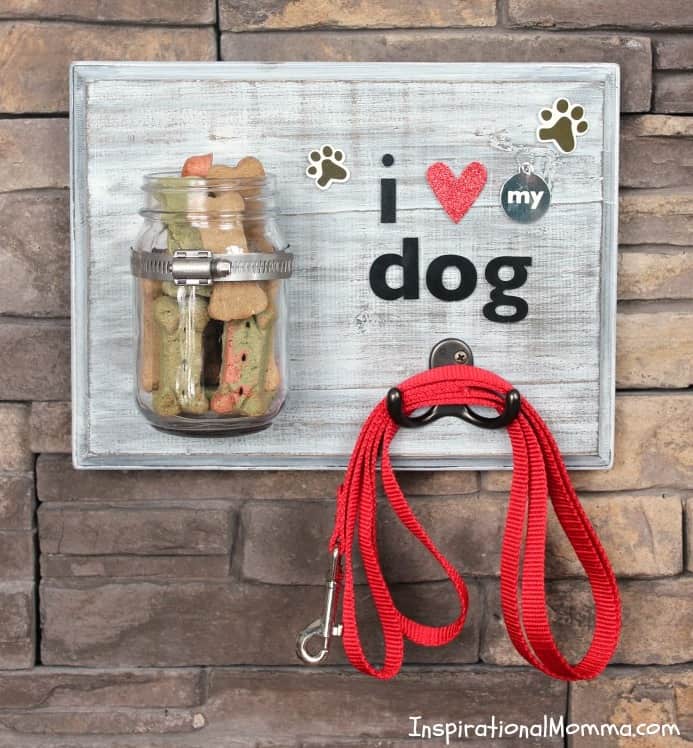
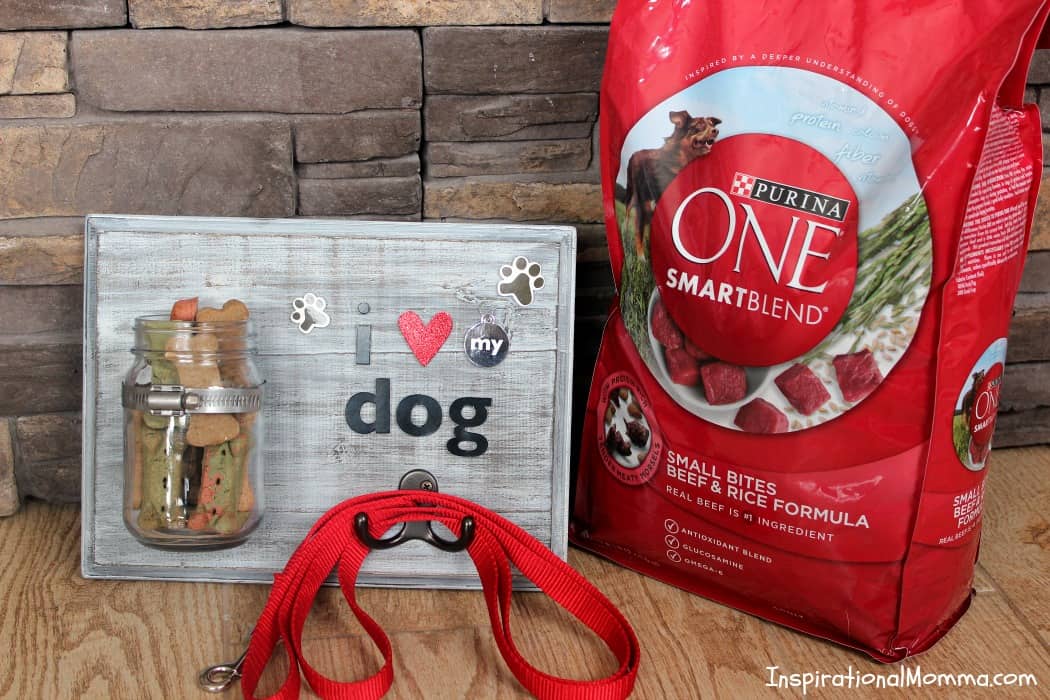
YOU DID IT!!! You not only provided your sweet pooch with a tasty meal, but you also created something that will brighten each and every day. This DIY Dog Treat & Leash Station will remind them just how much you love them! Now it's time to head out to Target and pick up some Purina One Smartblend Dog Food. It is Nala and Luna approved, and I am sure your pup won't argue!
I can't wait to hear all about your fur-child! Please share in the comments below how you enjoy spoiling them and letting them feel the love!
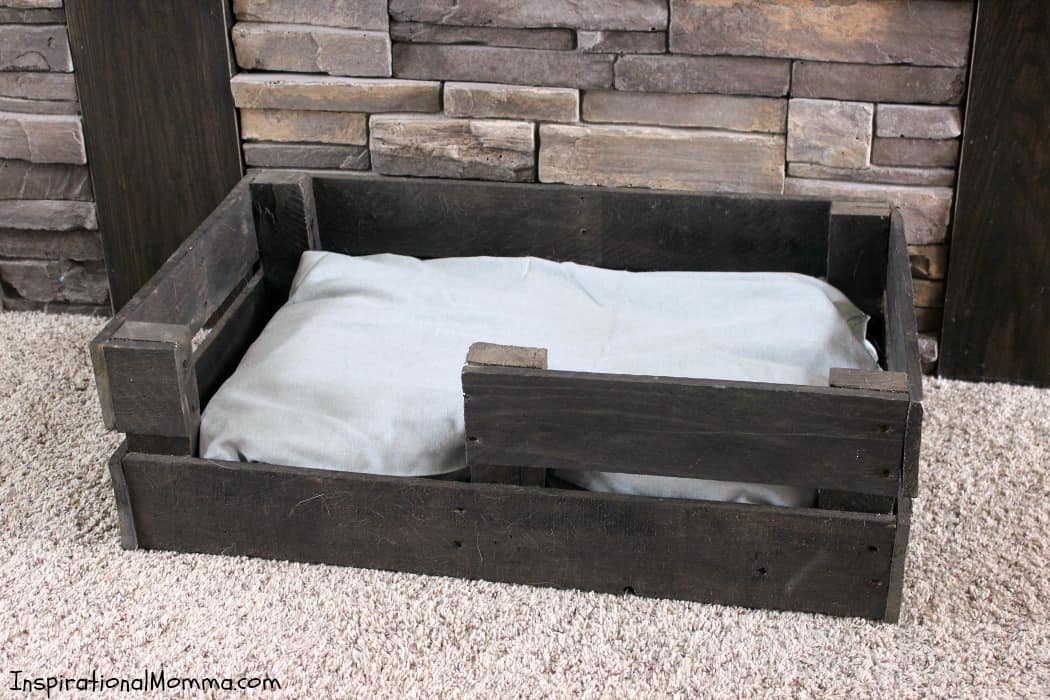
You should also check out this awesome DIY Pallet Pet Bed!
Get Inspired!
Never miss my delicious recipes, cute creations, or household tips!